Tool-evening!
Part of house-keeping procedures: taking care of and fixing tools.
Just to relax from boat-related work I took my wood-handled tools for cleaning and oiling. Among others are screwdrivers and felling axe. I’ve had them in raw wood condition since I bought them but with time and usage they got dirty and greasy so that wood texture disappeared behind the dirt.
I used abrasive wool for gently removing the dirt and keep the wood intact. First few strokes revealed long-gone memory of how the tool looked like before.
Some more elbow grease and 180-grid sand paper brought back the wood to raw condition.
All tools went the same way and in the end came the long waited moment: oiling!
I think everyone working with wood loves this moment when oil (or varnish) reveals and actuates the wood grain and colour.
It’s one of those things which attracts me to woodworking - beauty of the material.
Wood handles cleaned to bare wood, waiting for linseed oil
Oiled and posh!
I turned then to my new brace bit.
It is a newly acquired tool which shall replace my old brace - mostly because it has better gripping chuck and because it has a ratchet mechanism, enabling operation in tight space.
As much as I like this tool - its construction has a flaw, revealed on very first big screw which I was driving out of my boat.
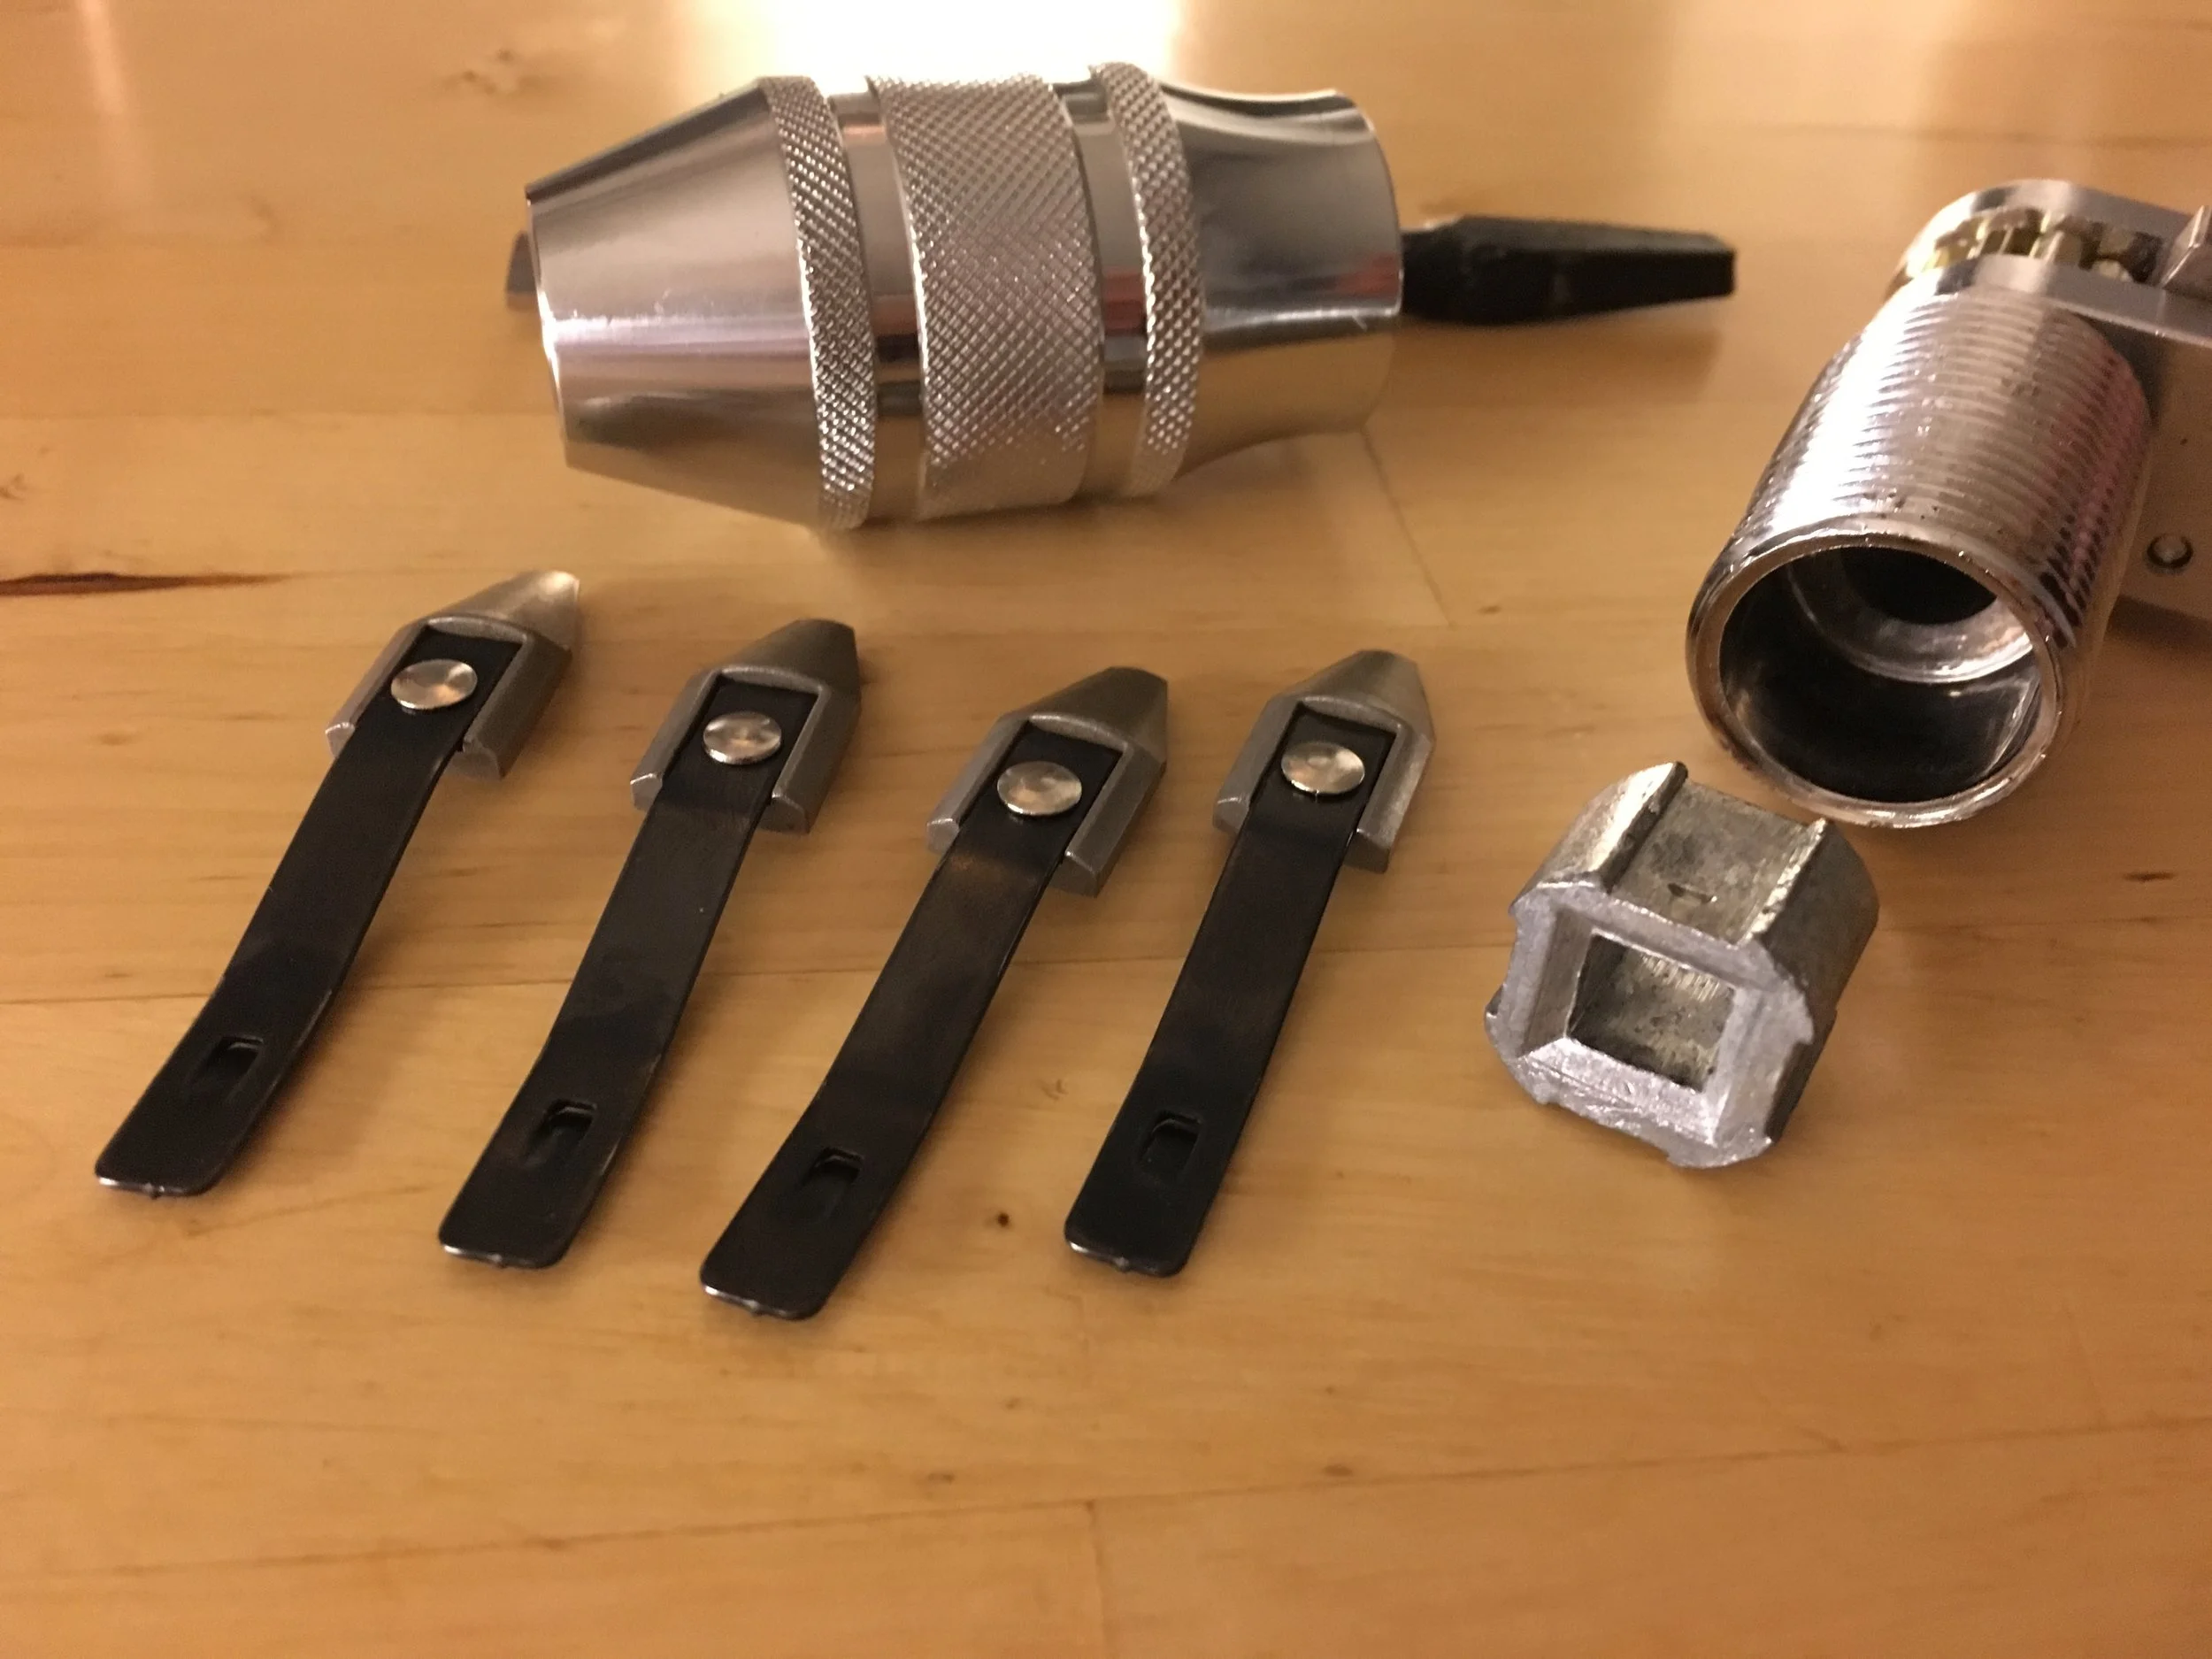
The chuck is wrongly made!
Instead of being machined from single piece of metal it is made of two separate parts. I understand saving costs but keeping both parts together only by means of friction is a mistake yielding tool being useless.
Disassembled chuck. The rectangular casting should be a part of the threaded chuck - or be mechanically connected to it. Instead it is a free standing part held by friction only.
The shop where I bought it has checked that all these tools are built the same way so we came to conclusion that sending mine for replacement will not solve the issue. Since I know how to fix the problem I agreed to keep the brace at half the price.
Fair deal I think.
How to fix it?
Well, one can braze both parts with silver or brass.
Epoxy would probably fail after some time due to constant sheering forces.
Since I plan to make customised inserts for this tool I’ve decided to mechanically connect both parts - so that I can easily disassembly it for repair or customisations.
So first come measurements for determining where to place screws.


Magic marker shows where I will drill, to end up more or less in the middle of the insert.
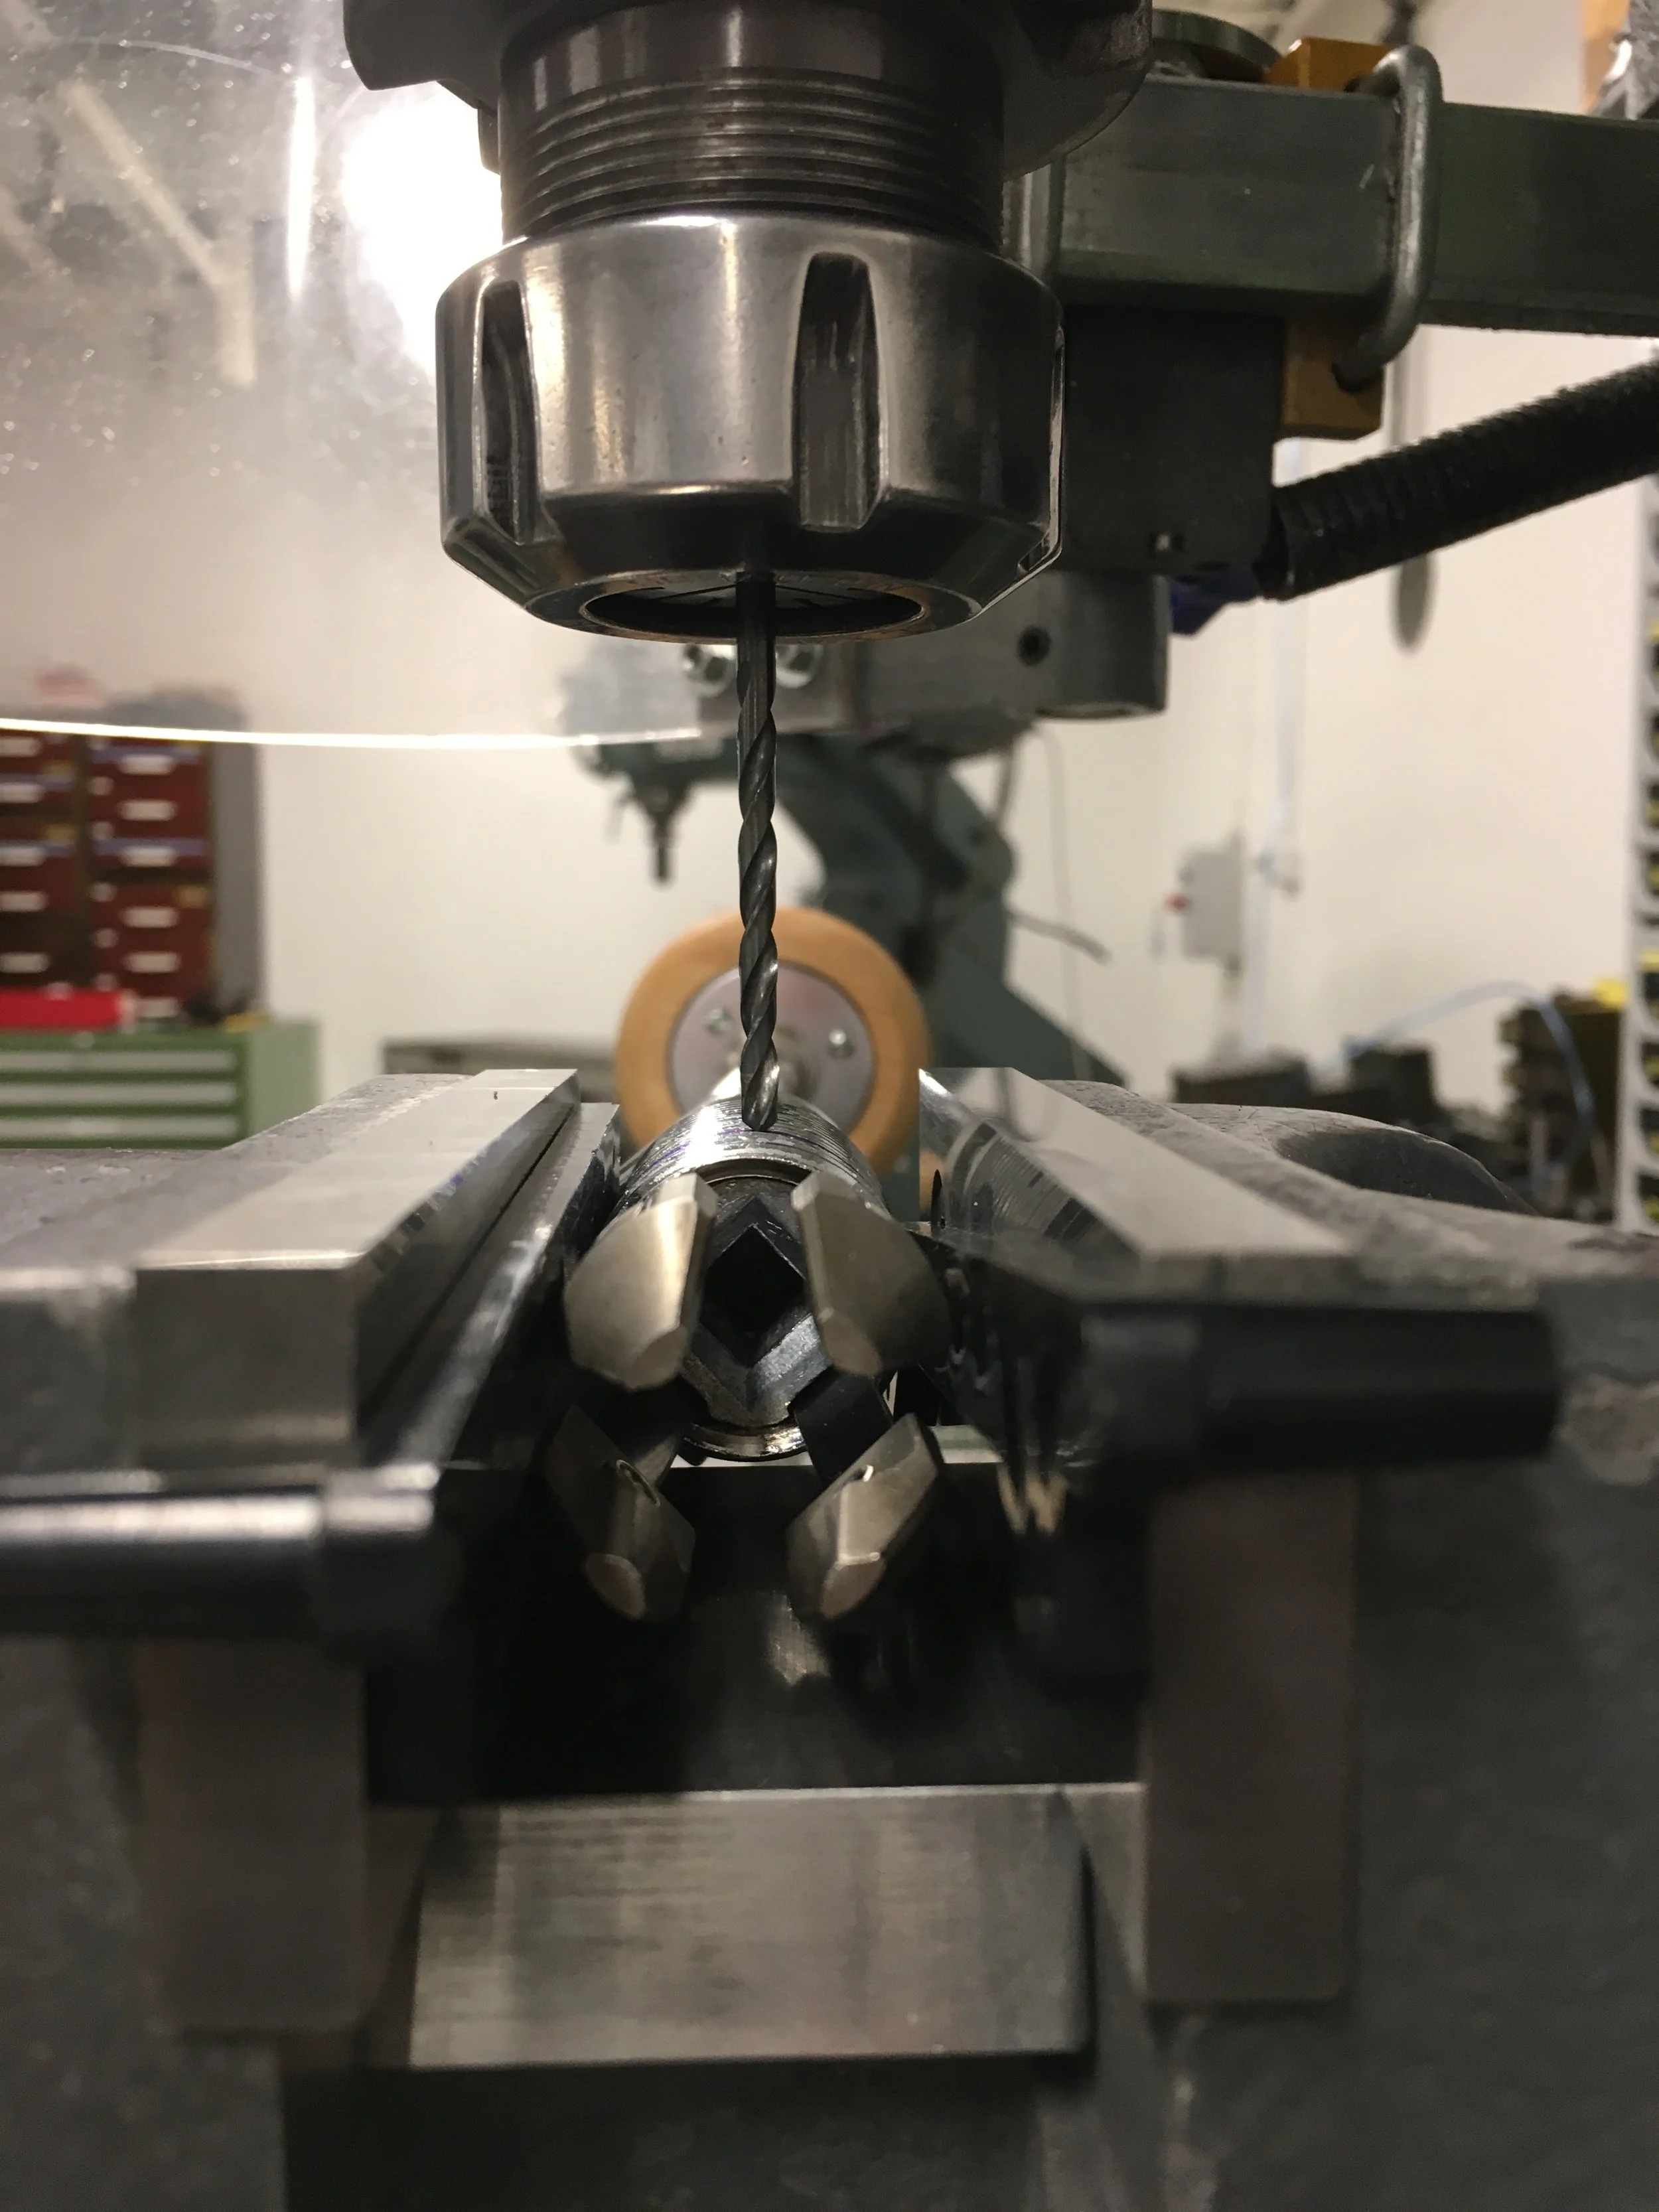
Then it was only to clamp the brace into vice, with some plastic padding to protect the thread. The part is aligned so that I will drill through the thickest part of the insert - to get a proper grip with stop screws.
It was a very quick job indeed - I chose M4 screws so I was drilling with 3.3mm drill.
Chuck’s metal is some sort of soft steel, cast insert seems to be aluminium alloy, both relatively soft. The only tricky part was to get the drill going straight in the beginning and not wandering away on the curvature. Hammer whack on pointing iron made a dent which always helps but in few cases I needed to manually guide the drill with a piece of metal on the side. Otherwise it was a piece of cake on the drill press.
Having the first hole drilled all the way I tapped it with M4 thread, inserted the M4 plunger and turned the brace for subsequent drilling.
It would be sufficient to have just one or two such stop screws really but since I had all the setup ready I went ahead and installed all four, stainless steel plungers.
After cleaning all the burr I adjusted depth of plungers so that chuck cover could be threaded back in place.
Assembled all parts back together and Bob’s yer uncle!
Now the brace is ready for really tough job!


