Keel bolt #3 - Demolition man
I’ve almost exhausted my scenarios for removing this stubborn bolt.
Hole saw did not work: after reaching certain depth it did not move any further. Vacuuming the dust and re-sharpening teeth had no effect. Null. Neda. Dead-end.
I switched to pneumatic sledge hammer in hope that constant vibrations will loose the bolt in the hole. 450mm long 18mm diameter drill was constantly banging this thing until smoke started to rise from the hole. Not a move. Neda.
After cooling down the equipment I’ve tried 4 more times - with no effect.
The only option now was to remove the floors to reach the remaining part of the bolt. Since this location will require rebuild of heavy frame anyway I was not hesitating to cut away the floors. Anyhow, I was curious to see the condition of oak which had rusted iron bolt - and is 60 years old.
Having now fresh oak from Poland gives me option to rebuild the floors so - here it started.
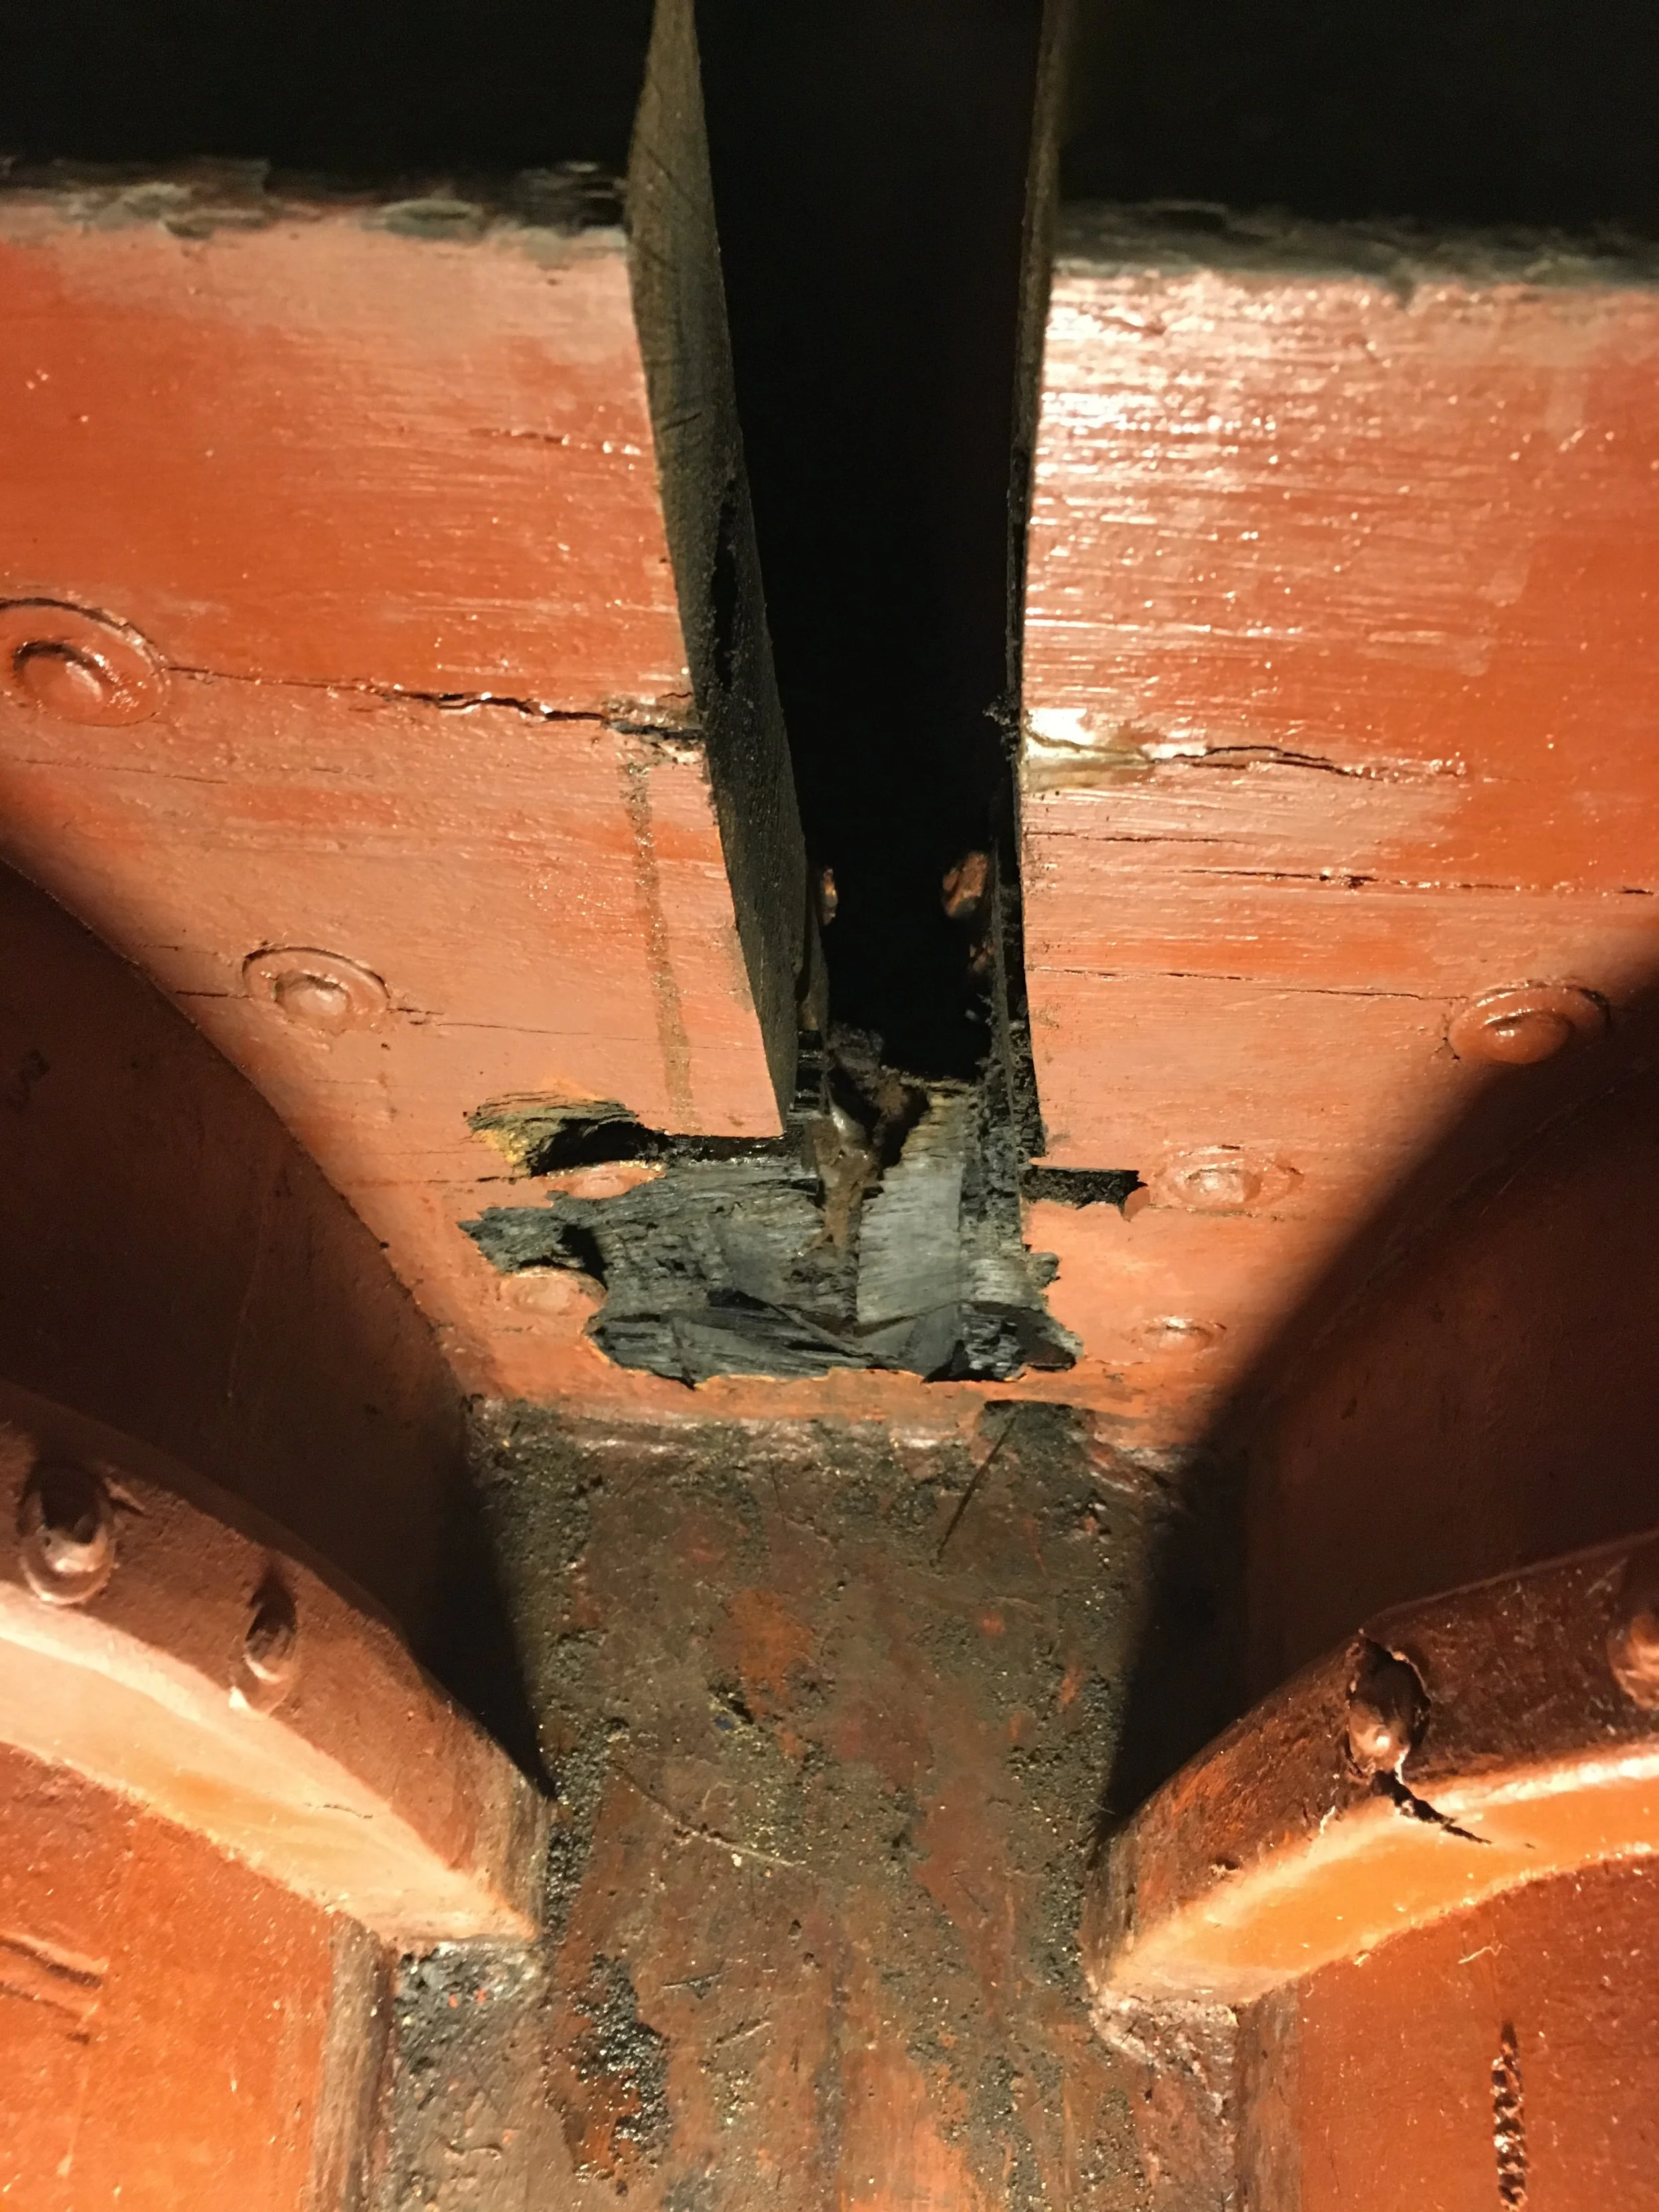
First I’ve cut away the middle of the floor, along the channel for keel bolt. After reaching almost the bottom I turned to chiseling out the wood and splitting oak to pieces.
Black, decomposed oak was all the way. No regrets. It gives me also the perspective how other floor timbers look like - they all need to be replaced.
But I focus first on this one.
Due to close proximity of heavy frames I could not cut with saw all the way so splitting with chisels was the only option. Fasteners connecting floor to frame are copper rivets - rectangular and very thick. All of them in perfect condition after all these years. The only reason for oak deterioration is nail sickness, due to iron bolt passing through it.
I’ve chiseled oak from under the rivets to hammer them further - to expose them on the other side, easier for accessing with metal cutter blade.
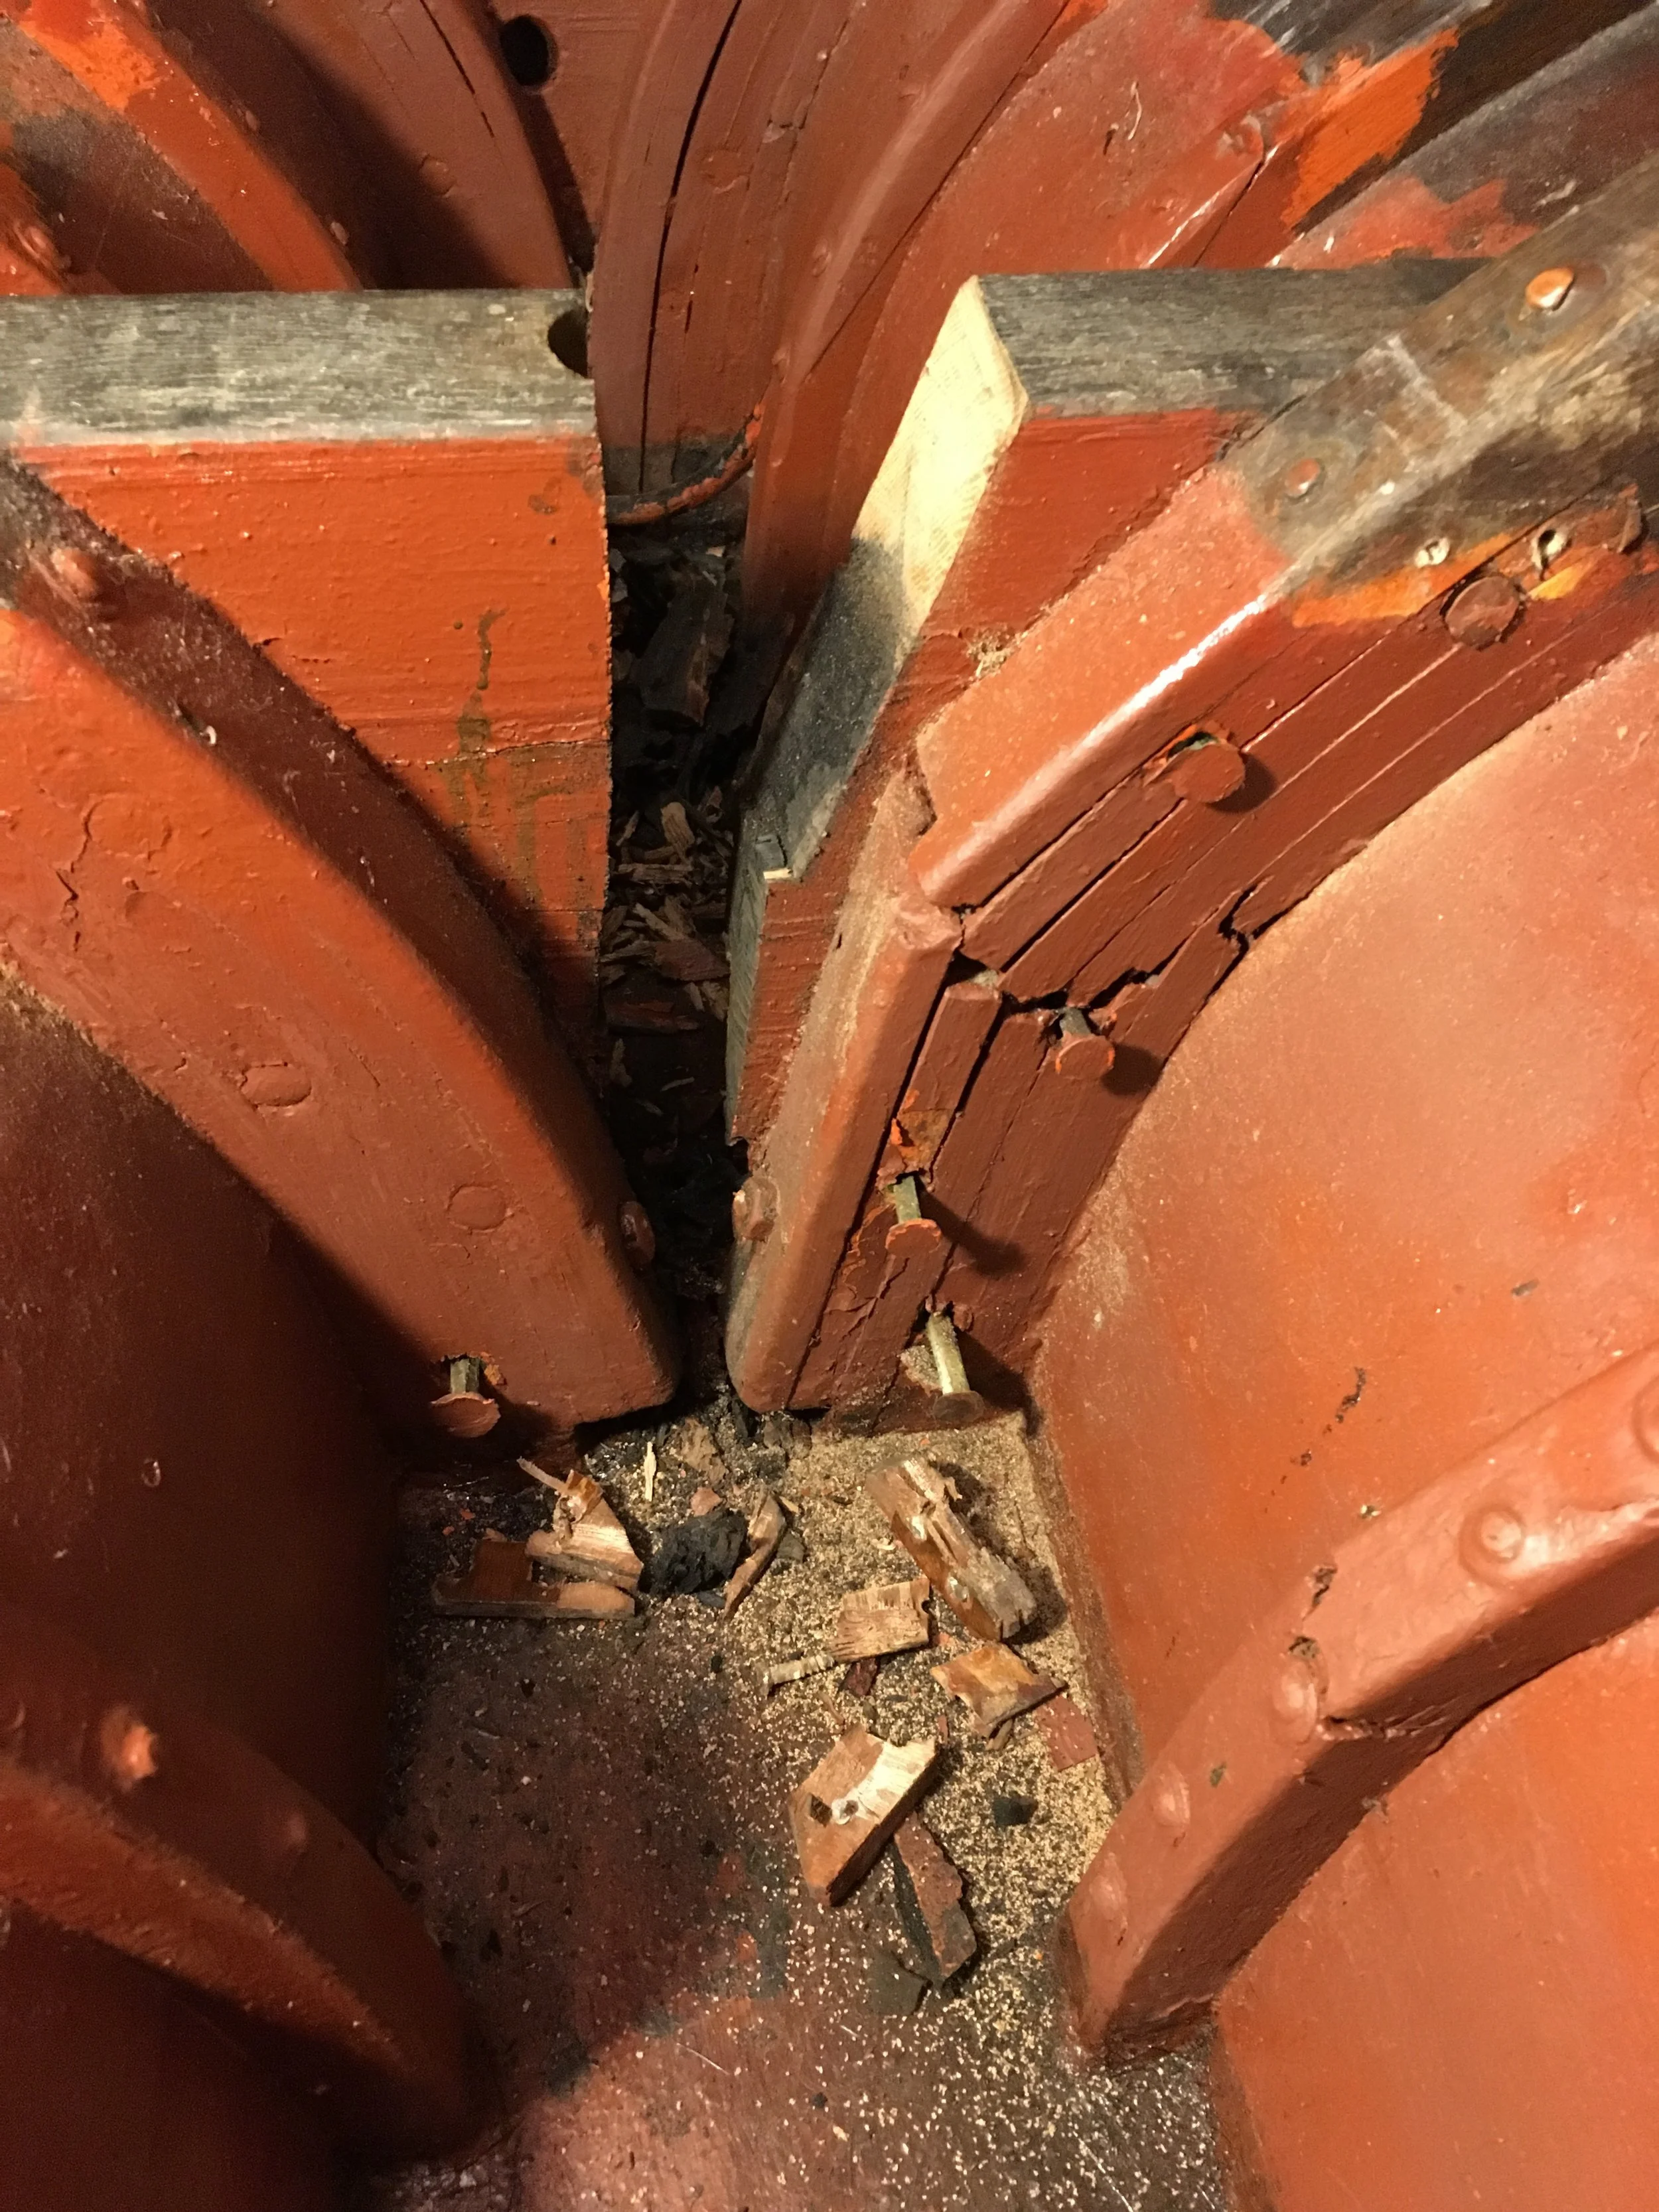
Demolition continued until the whole oak floor was removed. Unfortunately, Rosättra has used brass screws to connect floors to planking. They should have used bronze - brass screws became brittle (loss of zinc from brass) and impossible to drive out. After splitting all oak I could break the screws and - after careful removal of mahogany bungs on the outside - drive them out with a hammer. Easy but - it should have benn bronze, for Christ sake!
After cleaning the “operation theatre” the remaining part of the bolt is exposed. I’ve also partially removed the broken part of heavy frame in proximity.
What to do next?
I’ve figured that I still can wait with hammering the screw down and first try pulling it up (preferable method of removal) by finding a way to anchor chain in this short piece of the bolt.
I’ve drilled a hole via the bolt and inserted heavy-duty shackle.
I’ve connected my jig to the shackle and tried pulling the bolt by slow pumping of both 10 ton lifts.
Then something broke. It was not the shackle. Not the chain. And no, it was not the sound of bolt moving up. The bolt opened itself and split, releasing the shackle from drilled hole.
Well, what next?
Drill another hole!
So I did - well, tried. The drill broke while drilling and stayed in the new hole. Shit!
What next? Hell, yet another hole!
So I did - this time successfully but I figured that I should use smaller shackle to leave as much metal in the bolt as possible. I’ve again connected my jig to the new shackle, tensioned it, went down to the ballast keel and blasted hell-fire onto the bolt until it turned glowing-red.
Then I returned to the cabin and tensioned the jig a little bit more. Nothing happened.
Down again and blasting again with flames until bolt turned red again.
Nothing happened.
It became very late - with snow blizzard already making havoc outside and shutting down electricity in the whole area - so I’ve left the bolt under tension and went home. Hopefully constant pulling tension will release some friction with time so when I’m back to my boat I can try again pumping the jig and remove the thing.
If that will not work then I have only one more option left: hammering down the bolt with heavy hammer. That should at least brake it loose from surrounding oak. It will also probably cause it to “mushroom” on top so either I cut away that or try pulling it out with yet another drilled hole and new shackle.
Or - I can leave it in place, cut flush with keel timber and drill on the side a new hole for new bolt - or a pair of bolts. I don’t like that but it is an option.
Anyway - at least now I’m certain that other floor timbers need to be replaced. That makes the backbone rebuild less distant in time - the boat needs it very soon!


